Tuesday, December 17, 2013

Stained Glass Cookies

This is a recipe for the most magical and mysterious holiday cookies that you can make. This old family recipe is a little time consuming, but the results make such an impression that they are talked about every year.

I decided that I'd make them for the first time since getting rid of all our cookie cutters. these instructions include a downloadable template and instructions for fun shapes  which do not require nesting cookie cutters.

Ingredients:

1/2 cup sugar
1/2 cup butter
2 eggs
2 1/4 cups flour
2 teaspoons baking powder
1 teaspoon double strength vanilla extract

2 bags of life savers
1 bag  jolly ranchers (for blue)

Friday, December 13, 2013

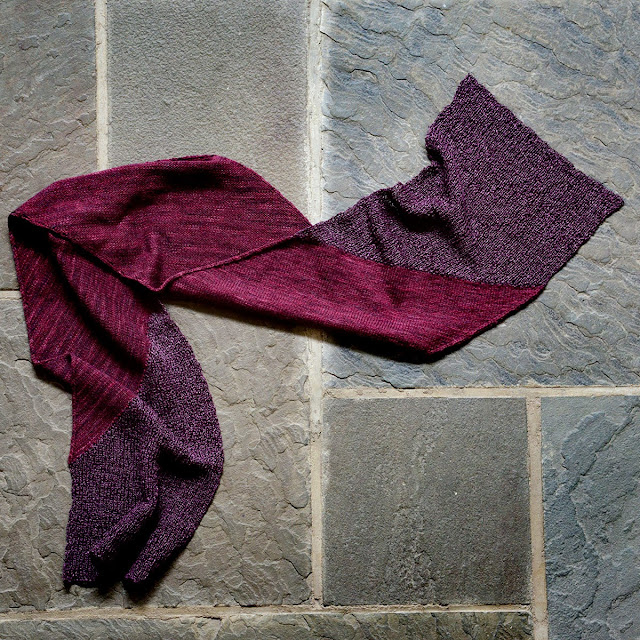
Simple Gifts Scarf

It is gift season and if you are a knitter, you are probably looking for some easy , fast last minute ideas.


Consider this simple brioche stitch scarf.

Saturday, December 7, 2013

Fingerscarves Finally

Did you ever wonder what would happen if a pair of gloves and a scarf had a child? What would happen if you just reached into your scarf every time your fingers were cold?
Well this is the answer to those questions that you never actually asked.

It took only 2 years to put aside time to actually edit and publish this pattern, does anyone even remember it?


How could you forget a scarf that has fingers.

Thursday, November 21, 2013

Carroll for Clotheshorse Magazine

I'm really excited to say that my first pattern made for a magazine is out. Clotheshorse magazine has published this color blocked sweater with set in sleeves and slimming side panels in a contrasting color.


Find it on Clotheshorse Mag


It's a style that is everywhere often seen on dresses, the color blocking creates the illusion of a slimmer waist. You can also see it in my prototype of the sweater, the dark sides definitely create an optical illusion.


I also did the trim in a different color and added a few short rows in the bust because I'm not a standard XS in the bust area. You can see the side stripe on the extra small is thinner, it's proportional to the size.

Double mustard reversible cabled scarf


I found this basic single ply wool at the craft store in bright mustard yellow and could imagine how a long cabled scarf would look - perfect for windy days. Cabled scarves are really nice to have in winter because they are thick and warm and really keep out the cold.

The only problem with my dream of the perfect cabled scarf is that I really dislike things that curl or look bad on one side. The solution is to make the cables reversible, its a little tricky to figure out upon first glance, but they are much easier to knit than they are to imagine.

Wednesday, November 6, 2013

Knit for work or play: Midnight Blazer

Last year, when working in a freezing office, I went looking around the internet for a  super warm work appropriate blazer. There wasn't a lot that left my forearms free to do computer work and fit my intern budget. I got the idea to knit something that looked work appropriate and chic yet a bit edgy with a bit of extra shoulder padding like a tailored blazer.
This silhouette is designed to flatter “pear shapes” by drawing the eye up and balancing a bottom heavy figure.


Working with Lamb's Pride Bulky (budget appropriate and a quick knit) I came up with this simple fitted cardigan with a modified set in sleeve. In 4 days of commute knitting and about $40 I had a great new piece to wear and established myself as "the intern who could fix your knitting."


My mom also made this and added long sleeves which are a great easy mod. she doesn't know I'm using her picture here, but she looks great, so I'm sneaking it up before she can object.


Also, Look at how nice her back neck looks.


Sizes - determined by bust measurement:

Bust Measurement (from body): XS(28-30”), S(32-34”), M(36-38”), L(40-42”), XL(44-46”)

Garment Bust: XS(15.5”), S(17.5”), M(19.5”), L(21.5”), XL(23.5”)
Garment Waist: XS(12.5”), S(13.75”), M(15.5”), L(17.5”), XL(19.5”)
Garment Hips: XS(17”), S(18”), M(20”), L(22”), XL(24”)
Garment Length: XS(22”), S(22.5”), M(22.75”), L(23”), XL(23.25”)


Grading, test knitting, tech editing, and illustrating the unique sleeve seams may have taken a year, but it is finally out and ready to purchase right here or view via ravelry so please take a look . 

Sunday, November 3, 2013

paper + cashmere scarf


Yes, paper yarn, and you can knit it.


The story of this scarf starts a year and a half ago when I visited the Habu Textiles showroom in NYC. I had already experienced their stainless steel yarn and wanted another one of their strange but simply beautiful and tactile creations.


Shosenshi Linen Paper

           p a p e r 

The samples in the showroom were amazing, the yarn creates a stiff almost spongy fabric that can be creased but otherwise retains a somewhat self supporting structure. You need to feel it to get it...


 A few months later, when I moved to Boston, Shosenshi was one of the few yarns that I took from my stash (most was in storage) because it needed to be used, but it is a tricky fiber to find an application for. 


That's when I came across Shalimar Breathless, a cashmere blend, in a coordinating color. Together they became this scarf, possibly the only thing I've knit that works both as a scarf on a chilly winter walk and a wrap for a black tie event. 


The result is a luxurious wrap that has a great stiff texture along the edges, but uses some of the softest where the shawl touches your skin. 

It is all about the textures, I'm just not a good enough writer to describe it, maybe a poet could. 

 Buy the pattern here or view the details on ravelry.

Saturday, November 2, 2013

I'm back, and with lots of stories.

Some of you may have noticed that I have been essentially absent for the last month, but now I am back from a much needed medical break.


A lot happened in October that you can expect to hear about - I designed and knit a shawl,  took it on a great photoshoot (above), made the next installment in my series of friendship bracelet videos,  had a traumatic carpet beetle infestation (picked up during that beautiful photoshoot), went to Comicon, and finished the designs for 3 scarves and a blazer.

You will get to read about all of these things, and more from the coming month soon. Thanks for sticking with me,
-Xandy

Saturday, October 12, 2013

Columbus Day Ravelry Pattern Sale

$1.00 off all patterns in my Ravelry store through midnight Monday the 14th, E. S. T.

Use code Chilly, works once per checkout but may be used for multiple checkouts.

Happy sweater weather.
 

Monday, October 7, 2013

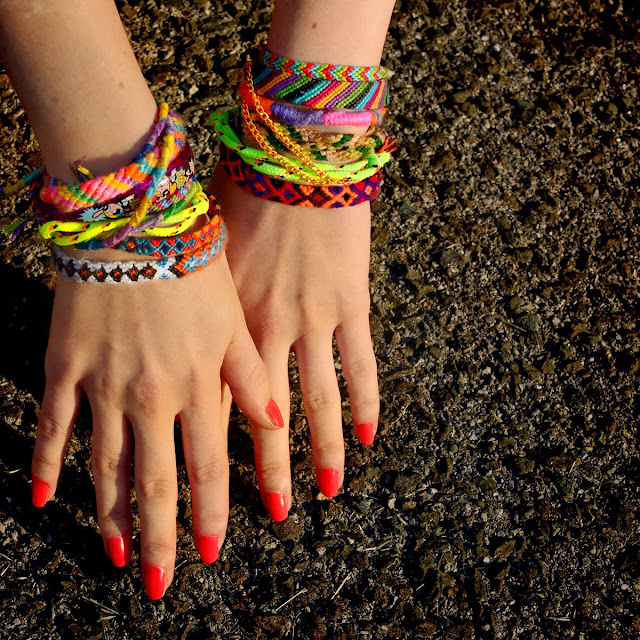
Friendship Bracelets Made Simple - Part 2, the Candy Striper

friendship bracelets outside on the pavement


Now that you know some basic stitches from the Friendship Bracelets Made Simple - Part 1 video, there are so many possibilities that you can make.

Friday, October 4, 2013

Makeover / How to add social media buttons to your blog

If you stop by every once in a while , you may have noticed that I've added a bit of color to the site just to brighten things up. For some reason I'm in a cyan tangerine mood these days. It seems to fit things better than grey and rust.

You might also see a few changes to the sidebar... there's a new thing that people are doing on their blogs: putting little coordinated sets of images that link to their social media sites. Adding these icons totally cleaned up my sidebar and decluttered, I recommend it highly. 

social media icon buttons for facebook youtube etsy flickr googleplus pinterest ravelry rss twitter bloglovin

Sunday, September 29, 2013

Friendship Bracelets Made Simple - Part 1, the Chinese Ladder

rainbow friendship bracelet crafted from macrame

Friendship bracelets are a super fun activity for kids and adults, but if you never learned the basics, It's hard to follow many of the tutorials and videos that you can find online

Thursday, September 26, 2013

GRIDS


grid plastic canvas bracelet black white

A few weeks ago, I picked up a few sheets of plastic canvas at the store because I had seen a runway show that used it as jewelry. I never remembered the show, but thought that it might be fun to play around with as a material. Using the plastic alone is kind of the opposite look of kitschy needlepoint, those bracelets will be posted next week and begin the same way, so keep reading even if you aren't into grids.

Friday, August 30, 2013

Polka Dot Pudding Recipe

A few months ago, I got this idea:  boba in bubble tea are tapioca, why doesn't anyone make pudding with them?


Tuesday, August 13, 2013

Double Box, Tornado, and more Lanyards - Classic Camp Crafts

Once you master the box stitch, you may want to multiply it by adding more colors to make a bigger lanyard. The same thing also works for the barrel stitch.


You may remember from the cobra stitch tutorial that you will need  plain gimp ,  neon, glow, clear, double sided or tie dye, and you can get a better color selection  online .


I also used some deerskin lacing and 3mm curb chain this time.


Remember you can make these as wide as you want, though the below is not recommended...


And now here's how to add the twist:


You can see what it looks like with more strings.


And a little bonus at the end showing you how to make my favorite stitch, the super box, or box 2. It has a really nice feel to it even though it is made of the cheap plastic.


So take a look, and leave some comments if you have questions. The video thing is still new, so be nice.


I got started slow this summer on the camp crafts, but expect more  vidyos next year, and definitely let me know what you want to see or anything you remember from your camp days.

Wednesday, August 7, 2013

Box and Barrel Lanyards, Classic Camp Crafts

Now, this is the  real classic  lanyard knot, used by sailors to boyscouts.  One of the first things you learn to make as a camper, or at least one of the first things I learned with gimp: the box stitch. 

You may remember from the cobra stitch tutorial that you will need  plain gimp ,  neon, glow, clear, double sided or tie dye, and you can get a better color selection  online .


Still loving that neon paracord though. it is good for everything.


Saturday, August 3, 2013

Classic Camp Crafts - Lanyards: the Cobra Stitch

Did you go to camp? I did, and while I was there, I used to spend as much time on the Arts&Crafts shack as possible. We made all sorts of things that were very often useless and ugly, but we also got to do the cool stuff like tie dye, clay pottery, and friendship bracelets. 


Lanyards were not on the list of cool or useful things  that you could make, but they were my favorite.


I made these 2 videos for all the ex campers out there who want to get nostalgic. It's also a great way for parents of kids that do not go to camp to share in the fun.

Wednesday, July 31, 2013

fortune cookies grafitti edition


Spray paint, summer colors, and a fresh baked batch of fortune cookies. These started clear...
Before folding, they each got a cost of paint, but not a solid color. Using the low pressure control of Montana gold allowed for a gradient to be created across the plastic. Then a base color was applied to complete the effect.


pink splatter


Shock sunset


 Blue sky


 Pinkish


Tuesday, July 23, 2013

DIY ombre jeans (or jeggings)

Spring and summer are a great time to wear white jeans. They flatter very few people's bodies, are impossible to keep clean, and often become semi-transparent in the sunlight. In real life, I'd never wear white jeans.


When my sister gave me these unworn (she didn't like them for above reasons) uniqlo jeggings, I really wanted to keep them so some changes had to be made. By dip dying the top part of white jeans, you can avoid visible underwear, grass stains, and a color that makes your hips and butt look bigger - at least a little. There are tons of dye tutorials around for cotton jeans, but I couldn't find anything to help with these semi synthetic pants. I've tutorialized this slightly more complex process for others that want to dye their polyester pants as well.

Tuesday, July 16, 2013

Spinning Color Dash Yarn

One of my first realizations about spinning was that it gives you total control to make any type of yarn you can think of.


For a really long time, one of my goals has been to find a kind of variegated yarn that only has a few dashes of bright color and will never pool. I also do not like hand painted yarns as much as those with fibers spun after dying.

Sunday, July 14, 2013

Who else is doing the TDF?

If i've been absent lately, its because I've been spinning.

The Tour de Fleece is a yearly spin along event that coincides with the Tour de France bike race. This is my first year following along on Ravelry and spinning every day of the race.


It is a whole lot of fun to see all of the interesting techniques, fibers, and anecdotes that the spinners post in the forum, but mostly it has been a great opportunity to gather knowledge in one place and gain inspiration and wisdom.

Today is day 15, and though I have spun nearly 3/4 of a pound of fiber, I just finished plying my first skein of the event.


One of my personal goals was to spin a thick(ish) yarn instead of my default lace weight. Starting with some corriedale wool from Paradise Fibers and fluorescent dyes, I created a 4 oz strip of gradient dyed combed top.


The fiber was then split in half lengthwise and spun into separate singles that were the same color.


I'm starting to suspect that I'm one of those people that has a color palate to my life and there are neons involved. The yarn dyed up to match my  neon rope baskets.

Then the singles were reunited to create one smooth gradient with just a bit of depth from slightly different coloring between the plies.

 
Unfortunately, the nerf football looking cop of plied yarn (yes all 4 oz) did a bunch of damage to the hook of my spindle, causing me to stop a few days for repairs before finishing the yarn.


The end result is surprisingly satisfying for my first go at a full skein of worsted weight 2 ply yarn. I cannot wait to knit it up!!


Wednesday, June 26, 2013

Guest Post: photographing sparklers

July 4th is coming soon and so is the season of picnics, barbeques, swimming and fireworks. Our stores here in CT have all kinds of summer items from picnic supplies to pool toys and a good variety of legal fireworks and sparklers. Last year, I asked my mother, a professional photographer, if she could photograph light drawing with sparklers. We got some really great shots of the glittery light as I scribbled words and shapes in the night air. It was so much fun that we bought more sparklers this year. I asked her if she would share her camera settings and give a few tips on how to take these awesome pictures and she agreed.


How to photograph sparklers at night


One of the first things that I experimented with when I was learning about photography as a kid was lights at night. It’s fun and is a good way to learn about your camera. Sparklers are another way of doing this. When you open the lens for long enough you can capture movement with a camera. That long exposure allows you to draw pictures with the sparklers and to create unique photos of your festivities.


You will need:


Sparklers - here are the two different kinds of sparklers that we bought. The little boxes are fun but the sparkler light does not last very long. The big box marked "neon" is very bright and easier to photograph due to the long burn time, but does not burn neon.
Pay attention to your state and national laws.

You need to have a camera with a Manual setting so that you can follow these instructions. This is marked as M on your camera and can be found on most SLR cameras; many point and shoot cameras, and some camera phones. This will be explained in more depth below.
You can't photograph and light the sparkler, so it is helpful to have a few people working on this and no kids on this one.

You will also need:

Tripod
Masking Tape - optional
Lighter
Piece of tin foil or a non-flammable tin for used sparklers
Flashlight


Setup


Find a safe place to photograph while it is still light out, a driveway or a sidewalk is a good place. Make sure that the background will be dark with as few distracting lights as possible. These lights will show up in your photographs and are hard to remove in Photoshop. Choose where your camera will be set up. Look thru the camera and have another person use masking tape to mark the center and edges of what's visible. This will be helpful if you want to set up more complex shots with writing or broad gestures. When it is dark, you will be able to go to your designated spots and things will run smoother than if you were running around aimlessly.


This picture illustrates with the red arrows how I marked out the frame of the photograph with white tape.
Set the camera to M (manual mode) which will allow you to better control your exposure. Set the camera on ISO 200 to insure that you will have no noise. The ISO tells the camera what kind of light situation you are in. The brighter the object you want to capture the lower the ISO. ISO 200 is normally a daylight setting but because the sparklers are bright you need this setting to capture the detail of the sparkler. This exposure should also insure that the background will be black.


Ready to go


Wait until the sky is completely dark before you start. Set your lens aperture at f/11 because of the brightness of the subject. Set the shutter speed at 8 seconds. Some cameras only go to 4 seconds and in that case set the aperture at f/8. These settings are a starting point. You may need to make adjustments depending on equipment.

Hint - If your exposure is too dark, increase your exposure time or set your aperture from f/11 to f/8. If your exposure is to bright, decrease your exposure time or change the aperture to f/16.

Put your camera on a tripod.

Some cameras will be able to auto focus on the sparkler and some won’t. I have explained both scenarios below.

Type 1 – autofocus method
When your partner lights the sparkler, aim the lens at the light while they hold it still. Your camera will be able to focus. If your pictures look blurry try Type 2 –manual focus.

Type 2 - manual focus
Turn off the auto focus setting and set on manual. This will vary from camera to camera. On my camera, this setting is located on the camera body near the lens on the left side. Illuminate the sparkler holder with the flashlight and make sure your partner is standing in the same place that they will be when you actually light the sparkler. Now focus the camera on something easier to see, such as their hand. Keep in mind that the sparkler will be extended an arm’s length from where they stand. With the focus set, when the sparkler is lit you’ll be ready to go.

You are now set to take the first picture. We got two or three photographs on each small sparkler, and ten 8 second shots with the large ones.

Now you can assess your images for exposure and sharpness on the viewing screen and tweak your settings as needed.


Troubleshooting:


Below are some examples of some photographs that did not work and may help you troubleshoot if you have some exposure problems. I have listed the technical data to help explain why they did not work.


Image A - ISO 1250, f 4.8, 1/30 of a second. ISO was too high image was overexposed.
Make ISO a smaller number, make the f/stop a larger number or make the shutter speed faster to improve the exposure of the photograph.


Image B - ISO 800, f 5.6, 1/100 of a second. ISO too high shutter speed too fast to show any action. The solution is similar as in A but in order to see action the shutter speed has to be longer.


Image C - ISO 800, f 5.6, 1/100 of a second. ISO too high - overexposed. This is a more extreme example of Image A.


Image D – ISO 200, f5.6, 2 seconds. Poor planning in camera frame. This is where the tape and pre-shoot setup are helpful.


Image E - ISO 200, f5.6, 2 seconds. Out of focus. My camera had trouble with auto focus which is why I used the flashlight on my sparkler holder’s hand to focus to produce better results.


Here are some of our favorites that we took because we could – I can never have too many photographs – and that’s the truth!


About our guest blogger:

Photography has been my lifetime career and passion. You can find some of my work on my website or purchase prints on Etsy.  I also have a blog where I am retelling the love story between my grandparents in real time using my grandfather’s love letters. Each one is posted exactly 100 years after it was originally sent. It is a wonderful look into the world they shared. Check it out!
-Beth Shepherd Peters

You might also like...